Friday, September 17, 2010

Nuthin' says lovin' like something from the oven...

Hot and Gooey Chocopots!


Mix together eggs, sugar, and flour


 Melt the chocolate and butter together over very low heat


 Mix the melted chocolate and the egg/sugar/flour mixture together and pour in buttered ramekin or pyrex dishes


 Bake on baking pan in hot oven


 Let them cool for 10 minutes if you can...Well. Can I say.. yummy!?!

ChocoHotPots


Preheat oven to 400 degrees farenheit

Put baking sheet on rack in middle of oven while preheating.
butter the inside of 4 ramekins (1 cup size)

In a pan on the stove, on low heat, melt 4 oz of semi sweet chocolate chips (or some other kind of good dark chocolate, I used Droste chocolate) together with one stick of butter. I took the pan off the heat just before the last bit of butter melted, and then stirred the chocolate butter combination till the butter was completely melted. I set it aside to cool.

I wisked 2 eggs in a bowl, then added 3/4 cup of sugar and 4 tablespoons of all purpose flour (if you like a more gooey inside, use 3 tablespoons of flour) and wisked it all together. Pour the cooled melted chocolate into the bowl, mixing it with the wisk till well blended. Pour the mixture into the ramekins (3/4 full).

Put on the baking sheet in the oven.
Bake 20 minutes and remove from the oven.  Let cool for at least 10 minutes if you can!

Cool these down, but eat them while they are still hot, with a spoon from the ramekin.
They are also good cold, if you must.

Addendum:
I made these again using Guittard semi-sweet chocolate chips.  I think I would reduce the sugar to 1/2 cup. 

Thursday, July 1, 2010

Welcome to my kitchen...

It really didn't take me a long time to adjust myself to my kitchen, I had lived with tiny kitchens for the past 14 years.  This is actually the smallest counter top I've had to work with.

Here I am preparing fried snapper and vegetables for dinner, and as you see, I use every bit of free space I can. 

This is how the counter looks before I start preparing dinner.  This is my new stovetop and in the other picture is our new range hood.  Marc and I installed these ourselves one weekend!


This is my new oven.  We waited 5 years before we were able to replace the old one.  I have enjoyed using a clean oven with a light that actually works and a clock that I can read!  Since I've replaced all the appliances in my kitchen, I've been a happier cook.  Now if I could get a bigger countertop...
A girl can dream can't she?

Wednesday, June 30, 2010

Is it wrong to drink the leftover wine in the bottom of the glass from the night before?

I mean really...
I can't just throw it out because I forgot there was still 2 oz in that glass!
Anyway....
Last night I ended up making luscious little salmon patties for dinner with a nice salad and fresh corn on the cob.  Tonight I am grilling the steaks that were still frozen last night when it was time to make dinner.  Since I have not been keeping up with my blog, I got out of the habit of taking pictures of food.  Not to worry, that problem will be solved so that I don't get so far behind.  I really want to work on my recipes, so I need to take pictures, write the recipes down, and share the work with my friends and family.

We have this big cabbage I've been cooking with the past week or so, so I felt like cold slaw would be a nice change.  I usually make it with mayonaise, mustard, onions, celery, cabbage and seasonings.  Today I didn't have the right ingredients, so I changed it up a little.   I rough diced about half the cabbage and added other diced ingredients of spring onion (3) and a persian cucumber.  I seasoned with a little salt and fresh ground pepper and a little dill weed.  I added about 2 Tblsp of  drained capers.  I mixed a drizzle of good olive oil with some white wine vinegar and mixed that in, then added a squirt of dijon mustard and 2 Tblsp of mayonaise and mixed it all together well.  It is sitting in the fridge a couple of hours before dinner so that the flavors meld.  I think it will be good.  I thought it was when I taste tested the finished product.

*addendum* 
Not only did this slaw turn out to be a nice fresh and crisp salad, Dad ate 3 helpings and then finished it off.  I always take this as a good sign... cause although he (Dad) says he likes everything, he tends to be highly critical of the way food is prepared. I thought it was a nice addition to dinner, and without the mayonaise might be a good picnic type slaw.  Summer is here... picnic often!

Friday, June 4, 2010

Nothing to see here...

No pictures.. just a wonderful dinner of Pork Chops saltimbocca made with bacon and brie stuffed into the middle of the chop, then smothered in a sauce made with garlic, red and yellow peppers, onions, lemon juice and butter.  The cheese melted just right, but I think Brie is a little too salty for this dish.  I made fresh corn on the cob which went with the dish so nicely, and lightly steamed brocolli.  I served it with a fresh salad and bleu cheese dressing, and then a dessert made from pound cake, fresh berries, and whipped cream.  Everything turned out beautiful and tasty.  Even Dad commented that the chops were good!
mmmmmmmmmmmm.. bacon

ohhhhhhhhhhhhh baby

One of my favorite dinners is one with baby back ribs cooked on the grill.  I like to use a dry rub with Jane's Crazy Mixed up salt and then cook them over a low to medium heat.  I love them this way.... Dad, however, likes them to be moist and falling off the bone.  So in order to make something Dad would like this time, I tried a new way.  I lined the pan with 3 layers of foil and put the ribs on the foil in the pan.  I then sliced 1/2 a small onion and several cloves of garlic, and cooked them over a medium heat with a pinch of salt to make them sweat, until they were tender and somewhat transluscent.  I then poured some white wine vinegar into the pan and let it cook down some, then added a big squeeze of dijon mustard.  I might have added some white wine, I can't remember exactly, but I think so.  I stirred the ingredients and cooked them till the sauce was thick, yet still wet.  I poured the cooked sauce over the ribs, wrapped the foil around the ribs, and put the pan into a preheated 325 degree oven.  I cooked the ribs for 2 hours in the oven and then removed them, taking them out of the foil and sprinkled some spice called BBQ spices. 
This spice has brown sugar and paprika in it, and I felt that it would balance out the tartness of the mustard, plus give it a nice color.  I preheated the grill to 600 degrees and then put the ribs over the hot side of the grill.  I cooked them till they looked like they were grilled, with a char on the edges.  I served them with a salad with my bleu cheese dressing, baby peas, and rice-a-roni whole grains rice and orzo.  It turned out to be a nice meal, although I thought they were cooked too long in the oven to where I thought they had lost the bulk of rib flavor.  I prefer smoked, but we didn't really have the gas to slow cook them on the grill with smoke.  Dad said, "they are better than I expected"!  A compliment of sorts from him... haha. 
Good food... good fun.

Friday, April 23, 2010

I thought you could grill most anything...

until I tried to grill brocolli.  All those tiny little florets on the bigger florets burned right up.  ouch

Monday, April 19, 2010

Salta in bocca! (it) jumps into (one's) mouth

Usually when I get those huge pork chops from Costco, I fry them like I would fry chicken to brown them, then I bake them slowly to cook them through and still keep them tender and juicy.  This however is an entirely different recipe all together.  I was looking through one of my cooking magazines and found a recipe for Pork Chops Saltimbocca that sounded interesting and tasty.  I didn't really have all the ingredients but I knew that I usually liked to do things differently than most recipes.  I like to develop a recipe to my own tastes using the foods I typically have on hand.

Here is how I made my Pork Chops Saltimbocca.

I had 4 thick (about 1 1/2 inches) cut loin pork chops that I patted dry with paper towels.  I sliced a pocket in them in the middle of the chop.  I wanted a deep pocket, so I tried to get as close to the other side as possible.  I seasoned each of the chops with salt and pepper and let them sit to the side while I got other ingredients ready.  I had mistakenly bought some camembert cheese that had a blue vein in it (instead of bleu cheese).  It was not as soft as I had thought, so I felt like it would be a nice consistency for this dish.   I cut it into slices and put 2 slices into the cut open cavity of the chop.  I turned on the oven to 450 degrees farenheit, and turned the burner on to low medium setting while I cut up 6 pieces of thick sliced bacon with kitchen shears into a large dice.
I put my large cast iron skillet on the burner and got it hot enough.   I began by putting the diced bacon into the hot skillet.  Stirring often, I cooked it until the pieces were light golden brown.  I removed them from the pan and put them on a paper towel to drain and cool.  I took the pan off the heat, but left the burner on while I finished preparing the pork chops.  (I might have drained some grease from the pan right about now) I stuffed the bacon in between the cheese slices in the pork chop, using all the bacon up and pushing the opening closed as well as I could.  I put the skillet back on the burner, turned it up to medium, and let it get hot again. I put the 4 pork chops into the hot bacon grease.   I let them cook for about 5-6 minutes until they were brown on one side, and then turned them over.  After cooking that side till it was also golden brown, I put the skillet with the pork chops into the hot oven for about 7 minutes to finish cooking.   While that was cooking I sliced 4 small red peppers with the seeds removed, and thinly sliced a half an onion.    Removing the chops from the skillet, I put them on a platter and set them aside while I  finish up my dish with a red pepper and onion sauce. 

I turned the temperature of the burner down just a little bit to a medium low again and put the onions and peppers into the skillet with the juices from the chops and melted cheese and let them cook till they are tender, about 3-4 minutes.  I added a lump of butter and let that cook for a minute then squeezed the juice of a half a lemon into the vegetables and stirred until they are mixed well. 
I turned off the burner and poured the mixture over the chops in the platter. I served this dish with rice and garlic brussel sprouts,
 
and a salad of tomatoes and sliced avocado.


The pork chops were tender and juicy.  The cheese was rich and creamy and had a sharpness from the blue vein, and the bacon was a salty crunchy addition that enhanced the tasty combination of meat and vegetables.  The flavors meld well together and went well with the other flavors on the plate.   I thought this entire dinner was one worthy of repeating. 
Boccappetit!

Saturday, March 20, 2010

I could make a lemon cake... what do y'all think?

I met silence when I asked this question and turned... Roberta's chair was empty... Dad wasn't on the couch... and then I heard the click of the front door as it closed.  I had to laugh.  They both got right up and went out the door to collect lemons so I could make a cake.  And what a nice cake it was!  I was so eager to taste it, I almost forgot to take a picture before I started cutting it!  It was a simple recipe to follow.  I used the one posted on the food network from the Barefoot Contessa, Ina Garten.  It had a nice full flavor, but not overwhelming at all.  It was light, yet the texture was like a pound cake.  We ate it hot out of the oven, covered in whipped cream.  We have a big tree of Meyers Lemons, so I can see many of these cakes in our future!


Here is how I made the cake...
First I preheated the oven to 350 degrees farenheit.  I took a stick of butter and let it come to room temperature.  I also broke two eggs into a cup and let them come to room temperature as well.  I measured out 1 1/4 cup sugar and put it in a mixing bowl.  I added the butter to the sugar, and on a medium speed, I beat the two together until they were light and creamy.  I added the two eggs to the mixture, one at a time, mixing each addition well.  Then I added 1/3 cup of lemon zest to the mixture and blended it in.   In another bowl I mixed together 1 1/2 cups flour, 1/4 teaspoon of baking powder, 1/4 baking soda, and 1/2 teaspoon of kosher salt.  In a 3rd bowl, I mixed together a little over 1/3 cup lemon juice and an equal amount of buttermilk with 1/2 teaspoon of vanilla.  Then I began to put the batter together in the mixing bowl with the mixer on a medium speed.  Adding alternately, by thirds, first the liquid mixture, then the dry mixture and mixing well in between, ending with the dry mixture. 
Pour the batter in a well buttered loaf pan (I like to use glass).  Bake on the middle shelf of the oven for 45 minutes to an hour.  The cake will look firm and will have a golden color to the edges and sides, and a toothpick will come out clean when it is done. 
Citron Appetit!

Thursday, March 11, 2010

Pretty Good

I have not only not taken any pictures, I have not been very creative when it comes to cooking these last few weeks.  I made some great meals while I was in Florida, but since I've been home, mostly I've just been... well.. status quo. 
Today I went to the grocery store and browsed around contemplating what kind of vegetables I needed for the week ahead.  Of course I got my favorite staples... young green beans, lettuce for salads, vine ripened tomatoes, onions, baby red and orange peppers, asparagus... and what is this? endive.... ?
So I'm standing in the middle of the aisle just staring at this ridiculously expensive little package of endive and thinking .."I think I've seen some really cool bites on cooking shows"...   My brain is racing!  I'm remembering the shrimp leftover from last night and wondering how endive really tastes.  Then I remembered seeing a little decorative display by the leaf lettuce and sure enough it was some  endive that was not packaged.  I grabbed one!  I mean, how much could that cost, right?( exactly 0.15 lb @ $4.49/lb= $0.67)
At home, I separated the tight little leaves breaking off 6 of them and washing them.   I wrapped them in a paper towel and putting them back into the fridge to chill and crisp up.  I got out some shrimp, and since there is just Dad and me,  I used only 4 shrimp.    I cut them up into small pieces and put them in a bowl.  I cut up 2 spring onions, slicing them thinly and added them to the bowl.  Adding enough mayonaise to bind it all together like a shrimp salad, I stirred the ingredients well and then squeezed a little lemon juice into the mixture and stirred it some more.  It tasted very nice.  I cut a small tomato in half and then cut the halves into thin slices.  After the endive was chilled, I took them out and scooped a tablespoon of shrimp salad into each leaf.  On top of that endive leaf I put a slice of tomato.
The crispness of the endive and the creaminess of the shrimp salad with the succulant bits of shrimp and crispy green onions mingled into the mixture was ... can I say... sublime.
I'm sad to say that I did not take pictures.  But I will tell you, Dad immediately started shaking his head to the affirmative and ate every bite right up.  Then, without prompting (!) Dad said, and I quote, "Pretty good."

Tuesday, February 9, 2010

Traveling... no internet

It hasn't stopped me from cooking.. shrimp fajitas for super bowl sunday, just making it up as I go.  I hope to catch up when I get home in 2 weeks! Till then... as Julia would say, bon appetit!

Monday, February 1, 2010

Patty cake Patty cake....


Dad loves fried things... fried chicken, fried fish, fried crab or  fried salmon patties.  Of course, I,  being raised in the south, also have an appreciation for fried food.   I grew up making fried chicken for Sunday Dinner every week.  As I grew up in Alabama when we caught fish or crab out of the Mobile Bay, we immediately fried it all up right outside on the grill in a big pot of hot oil.  I have to say my favorite food of all is fried gulf shrimp, although fried crab claws run a close second!  I also adore crab cakes, and although they aren't deep fried, I like a pan fried cake to have some qualities of deep fried food.  I have a recipe for fried patties that can be used for crab, salmon, tuna or even for leftover fish that can accomplish that.  I really prefer blue crab, jumbo lump type. Whether you use fresh or canned fish or crab, they always turn out really scrumpcious
I always find the salmon patty to be a nice treat.   I enjoy using the small sized cans (6 oz)of wild caught salmon that I can get for a good price in Costco.  It has all meat, has no skin or many bones like some of the larger cans I have used. 


Last night I used 3 cans of salmon, one of those cellophane packets of saltine crackers (that comes in a box with 2 or 4 of these packets in it), 1/4 diced  onion, and a few tablespoons of mayonaise ( I'm allergic to eggs and using mayonaise puts minimal egg in each patty).   I usually like to put diced celery in salmon, tuna or leftover fish patties.  If I were using jumbo lump crab, I'd eliminate the celery (unless I'm using pasturized crab), and I'd use only half as many crackers for the binding so that the crab taste would star in the patty.  I hate a crab cake that is too bready!  Now with salmon patties made from a can, I think a little more cracker gives the denser fish a lighter texture.  I like to use saltine crackers for my patties, they are salted, so I don't add any more salt to the mixture, and they add a crunch factor that bread crumbs or panko just can't. 

I put the packet of crackers in a big mixing bowl and crunch them up.  I usually use my fist and a wooden spatula to do that .  I like the many sizes this produces.  If I use a canned product, I always drain the liquid off and then go through it so that the fish is broken into pieces.  I don't like to add the bones that can come with the salmon, so I look for bits of that and try to get it out.  You don't have to do this, I just do.
So after mixing this together with the crushed crackers and the mayonaise, I form small patties, not working the mixture too much, just enough that it sticks together.  I use my hands for this whole process.  It mixes without breaking up the ingredients, especially if you are using the more delicate lump crab.  I like a thinner type patty as opposed to a ball type.  I like the crunch factor that the smaller patty has to offer.    I then put the patties on a plate, cover them lightly with plastic wrap and put them in the fridge for an hour or so.  Sometimes I only have time for 15 minutes set time, but if you let them set in the fridge, they stay together better when you are cooking them. 

I cook my patties over a medium heat in a cast iron skillet.  Some people like to use a deeper amount of oil when they fry, but I use enough olive oil layer to only to cover the bottom of the pan.   I let it get very hot before I put the patties in.  They should sizzle when you put them in.  I usually use a bit of cracker to see if the heat is ready.  It will sizzle when it hits the hot oil if it is ready.  Don't crowd them, but you can cook several patties at one time.  It really depends on how big your patty is, how your stove cooks and how you turn your food.  Due to the delicacy of the fish cake in general, you only want to turn it once, but if you need room to make the turn smoothly, put fewer patties in the pan.  I'd say 4-6 patties at a time works best.  I usually cook them about 3-4 minutes on each side.  I want the sweetness of the onion to sweat out just a little and it to be tender, yet still a little crunchy.  I want the patty hot all the way through, and I want that nice golden crunch of the crispy saltine and fish on the outside. I drain them on a paper towel before serving.  

To accompany the salmon patties we had a simple salad of red leaf lettuce, tomato and avocado, and a light olive oil and red wine vinegar dressing, and green beans that I cooked over medium heat in chicken broth till they were fork tender. 

Saumon Appetit!


Sunday, January 24, 2010

Short on Ribs.. not short on good!


Last week sometime,  Dad brought home short ribs to cook, so I decided to make a nice stew out of them.  I've made short ribs various ways; on the stove, in the oven, with noodles or rice... with wine, without wine.   Now the very first time I made short ribs, we had gotten a huge package of short ribs from costco.  There was about 8 huge ribs with the bone in, and after purusing the internet for a good recipe, I found one with pictures that looked incredibly delicious!  I followed the recipe, similar to what I followed here, only I used a deep rich red wine, probably a Cabernet I had, and in this recipe, I only used about 3/4 cup of Merlot.   I also cooked the first recipe in the oven.  This one is on the stove.  So I began by searing the ribs in my cast iron skillet and put them into a bigger 7 quart sauteuse pan after they browned.  I used the cast iron skillet with the fond bits still in the bottom, and added chopped celery, onion, and carrots.  I opened 2 cans of stewed tomatoes, drained the juice and set it aside, chopped the tomatoes into smaller pieces and added them to the mixture.  I then poured the vegetables over the browned ribs in the bigger pan.  I then used the skillet and added the tomato juice and a 32 oz box of organic beef broth, cooking them together for a few minutes.  After the broth heated, I poured it over the vegetables and the meat and put a cover on the sauteuse pan.  With the heat on low, I simmered the short ribs until they were tender, about an hour and a half to two hours. 
In the meantime, just before I served dinner, I sauteed 3 cloves chopped garlic in a tablespoon olive oil, and then sauteed a pound of spinach in it .   While that was preparing the garlic, I boiled some no-yolk noodles till they were tender and then drained them and put them in a bowl.   We served the stew over the noodles, with the spinach and a nice fresh salad with bleu cheese dressing that I made up.  I have to say that I got raving reviews for the stew and the spinach from both Marc and Dad, even from me! 


Bon Sauteuse!

Saturday, January 23, 2010

Cluck cluck goose..

I am going to try a new version of Chicken and Dumplings.... check back later

Tuesday, January 19, 2010

I feel like left overs...

Sunday I made baked chicken quarters and baked cauliflower with a nice salad.  I seasoned the chicken with my favorite crazy janes, and tossed the cauliflower with olive oil.  Baked cauliflower is a new discovery for me (thanks Roberta),  and since the two dishes take about the same amount of cooking time, I thought it was a perfect pairing.  I cooked the cauliflower in my new Corning Lite casserole dish, which I love!  I was picking up a few things at Target, and it was sitting somewhere out of place, which caught my eye.  I had just been complaining that the pans we have are all just too small, and this one has a plastic lid for storage as a bonus.   It cleans up really easily.  Of course, there are no pictures, I forgot.
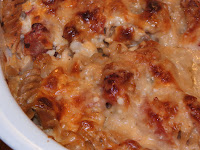
I used my new pan to make the left-over chicken into a casserole on Monday night.  I tried to use what we have around the kitchen, so first I de-boned and cut the chicken into small bite size pieces and covered the bottom of the pan.  I cooked some fusilli noodles and drained them, browned some onions, added a can of tomatoes to the pan to mix them and some seasonings, and then poured it over the chicken.  I poured in the noodles and mixed that together.  Then I took a beaten egg in a cup of cottage cheese, stirred them together and sprinkled the mixture over the noodles.  I stirred that lightly to get the cheese through the noodles.  I then covered the top with 8 oz grated cheese (half mozzerella, half parmesean).  I baked it for about 40 minutes and then took it out of the oven.  I served green beans that I simmered in chicken broth and a salad with tomatoes and avocado.  I was surprised how much Dad ate, cause he doesn't always like my concoctions.  He seemed to like this.  I would have liked a little more mozzerella cheese through the mixture, but I thought this was good for being leftovers. 
Leftovers for tomorrow!!


Restes Appetit!

Tuesday, January 12, 2010

"What a dump!"

I've been thinking about chicken and dumplings for days... I've been wishing for that hot creamy comfort food since I got sick last week.  I don't really know why, but I think because everything else made me sick to my tummy, that I had this idea that the perfect food for me would be chicken and dumplings.  Now, Dad does not like the way I usually make dumplings.  He doesn't like the thick fluffy style of dumpling.  I usually drop bisquits I have made into the hot bubbling liquid filled with chicken and broth and cook it uncovered and then covered.  Marc loves those thick kind, as do I, but I was looking for another way to do it so that it would please all of us.  My Aunt Miriam has been known to use flour tortillas for dumplings because of the simplicity and time saving steps.  I think this is a viable alternative, but  I'm only moderately happy with the results of that. I find them too much not like a dumpling.   I started my search on the internet, reading dozens (if not hundreds) of recipes, watched You Tube videos and read through my Cook's Illustrated and Cook's Country.  I found many ideas, and thought that I had decided what I would do for my new Chicken and Dumplings recipe.

First I took the leftover chicken, minus the skin and herbs in the cavity, from the fridge, and I put it in my Le Creuset pot.  I used about 3 cups of water to cook through and to soften the chicken up. I wanted to get the bones out, but get as much flavor from the meat as I could.  After the water came to a boil over medium heat, I turned the chicken cavity over to make sure both sides got cooked through.  I turned the broth off when the chicken was all cooked and let it just sit on the stove to cool while I got the rest of it ready.  I used my LeCreuset saute pan and put about 2 tablespoons of olive oil in the bottom.  I turned the heat on medium and started to chop my onion (1 whole onion) and chopped about 3 stalks of celery.  I put both of those into my pan and stirred them until the onions were transluscent and the celery tender.   By now the chicken in the pot was ready to debone.  I took the larger pieces out and cut them into smaller bite sized pieces and then made sure all the meat was off the bones of the cavity of the chicken.  I put it back into the pot and turned the heat back on it.  I opened a 32 oz (4 cups) box of low sodium Chicken broth and poured about a cup of that into the pan with the onion and celery.  I stirred it to make sure I got all the fond from the cooked vegetables into the broth and then poured it into the pot.  I added the rest of the broth to it and let it simmer on a medium low heat.  I then take the package of chicken thighs out of the fridge and opened them, washed and dried them and seasoned them lightly with my favorite pre-mixed seasoning, Jane's Crazy Mixed Up Salt.  I put 2 or 3 cups of flour in a paper bag and put the chicken into that bag and shook the chicken parts and flour so that the parts are coated.  I put 1/4 to 1/2 cup olive oil in the pan and turned the burner on medium.  When the oil was hot, I put the chicken in so that I could fry it.  It took a while, cause I had about 6 thighs, and the pan would only hold 3 at a time.  I fried them until they were cooked through and crispy.  (Marc enjoyed eating the crispy chicken skin as I pulled it off the chicken)  I drained the pieces on paper towels and then pulled the biggest pieces of skin off and "discarded" them. I then cut the chicken into small bite sized pieces and threw it into the simmering broth, vegetables, and chicken.  Although I took off most of the skin, I left on some of the crispy crust, just for fun.  After I did that, I could see that I had lots more chicken than I realized.   After it cooked for 10 minutes or so, I took a slotted spoon and removed most of the chicken from the broth and put it in a bowl to add back later.  I added a second box of broth to the pot so that it could begin to heat up.   Now for the dumplings!!
I took 2 pre-made frozen pie crusts out of the freezer and thawed them while the chicken was cooking.  I unrolled one at a time onto a floured cutting board.  I took some flour and rubbed it onto the upper side so that both sides had a light coating of flour.  I hoped to accomplish 2 things with this... keep it from sticking together, and to give the broth some thickening agent since I wasn't making my typical dumplings.   I used my knife and cut the pie crust into 1 inch squares (or 2 inch, I didn't really measure that carefully).  I tried to make them all close to the same size so that they would cook at the same rate.   When I finished doing that, I turned the heat up on the broth to a medium high temperature so that the broth would begin to boil.  As the broth began to bubble rapidly, I began to drop the dumplings into the pot.  I stirred to prevent the dumplings from sticking, but they actually seemed to do fairly well in the bubbling mixture.  When I finished adding all the cut squares into the broth, I let them cook for about 5-10 minutes uncovered.  Then, I added the rest of the chicken back into broth, spooning it in a little at a time so it wouldn't cool the broth down too much, and stirred it in.  When I finished adding the chicken, and the broth returned to a vigorous bubble, I turned down the heat to medium, put the lid on the pot, and continued cooking for about 10 more minutes.  After that, I checked the dumplings by taking one out and tasting it.  It still tasted kind of doughy, so I let it continue cooking for 5-7 minutes more.  This time when I tasted it, the dumpling was not at all doughy, or gummy, and imparted a delicate chicken flavor in my mouth.  I was actually surprised at how nice the texture and flavor was.  I turned off the heat and finished cooking the green beans and took the pot to the table.  We had a nice red leaf lettuce salad with tomatoes and avocado and the rest of the bleu cheese dressing I made over the weekend to go with it. 
I must say.... .the chicken and dumplings were divine.  I added no more seasoning than what I put on the chicken, yet it was perfectly seasoned!   Even Dad said it was very good and that he liked the dumplings done in this way.   I felt proud of myself and my new recipe!

I took this picture of my plate, with my new camera.  It makes me hungry just to look at how good it looks.  I hope it inspires you to make a nice batch of chicken and dumplings.  It is rich and creamy and oh so good!!
Boulette Appetit!

Monday, January 11, 2010

I won't be cooking for a week...


Oh dear foodie friends... I am going on a little trip up north to Chico to visit my friend Janet, so I won't be cooking or making pictures.  Today I got my new camera,  so as soon as I know what I am doing, my pictures will be closer, clearer, and crisper!! I'm looking forward to sharing my adventures with you all ! love and good food, Milo

Saturday, January 9, 2010

Tomatoes, butter and cream... oh my!

This is totally not my recipe, I found it in Gourmet magazine last year.  It is from the book, 365 Menus, 365 Recettes by Edouard de Pomiane, a food scientist who developed many simple recipes during a time when women spent all their time in the kitchen.   Simplicity was his method, and the tastes (based on this one recipe) were divine!


Tomatoes a la creme
Take 6 (ripe juicy tomatoes work best) tomatoes and cut them in half on the equator.  I have used heirloom tomatoes during the peak season (yummmmm) and those little campari tomatoes.  The campari tomatoes were too small to get the full essence of the dish because they really cooked too long and turned to more of a sauce, but made a wonderful tomato cream sauce that was divine on the fish we had prepared on the grill for dinner.   This would also make a wonderfully tasty sauce for pasta!  While you are making this dish, turn your oven on to 200 degrees farenheit and put your serving dish on the top rack to get warm.
Melt a lump of butter in a frying pan.  I like to use a large stainless steel frying pan with a copper core bottom in order for all the tomatoes to fit side by side and use a medium or slightly lower setting (somewhere between low and medium, depending on your stove).  After the butter has melted put the tomatoes in the frying pan, cut side down.   Using a sharp knife point, puncture the rounded side of the tomatoes in several places to let the steam escape.  You will want several pokes, maybe 4 or 5.  Let them heat for 5 minutes and then turn them over.  I find that using a pancake turner is the best way to turn them so that they keep their shape and turn over in an easy manner.  Sprinkle the cut side with salt (I prefer grey unrefined sea salt, or kosher salt) and cook them for about 10 minutes.  Turn them over again.  The juices should run out during this time and spread out into the pan.  Once more turn the cut tomatoes cut side upward.  Add 3 oz of heavy cream into the pan around the tomatoes (you can use creme fraiche if you prefer, but I've never used that so I cannot comment on the similarities or differences).  Mix the cream with the juices.  As soon as it bubbles, take the serving dish out of the oven using something to protect your hand like a pot holder, and then slip the tomatoes and all their sauces onto that warmed serving dish.  Serve instantly, very hot.  Delish!!
Ingredients:
6 ripe heirloom (or other nice plump tomato with a good aroma) tomatoes
2-3 tablespoons of butter
3 ounces of heavy cream or creme fraiche
salt to taste

Heaven in your mouth...
Tomate Appetit!

Friday, January 8, 2010

Friday and Soup

Being sick does not make for a good cooking experience but today the cold weather calls for some good soup!  Right before Christmas I made a pretty good pea soup from a mix, but found it to be too salty for my taste.  I added some potatoes to it to cut down on the over salty taste, and it helped, but still was more salty than I enjoyed.   Today I used some dried split peas and set out to make a good and hearty soup using the left-over New Year's Day ham, in my brand new Le Creuset Pot!


 Here is my recipe:

First I cut up a medium sized onion and cooked it down on medium heat with a little olive oil in the frying pan.  To that,  I added 2 sliced up carrots, 2 celery stalks chopped, 3 cloves of garlic chopped or diced and cooked them until they were all starting to sweat, turned down the heat a couple of notches, then added 1 cup hot water to them to get all the juices and flavor out of the pan.  I rinsed 1 lb (2 cups) dried split peas and put them in the pot.  To that I added the water and cooked onion, carrot, celery and garlic, and 7 additional cups of hot water to the pot.   I also added all the ham leftover from New Year's Day, about 1 lb or 2 cups cut up into smaller pieces. I covered the pot and stirred occasionlly,  simmered over a low heat for about an hour.   
The meal is complete with baked sweet potatoes and a salad with red leaf lettuce, sliced tomatoes, and avocado.  I will top that off with homemade bleu cheese dressing that I made earlier this week.

Bon Creuset!